A Powerful Lead Generation System Teaches You How to Set Email Collector, TagManager, Analytics + Remarketing Correctly.
We want your email address, your phone number or any other contact details so that after we could turn you into a client. Sometimes we do not even follow a step-by-step sale cycle so we can convince you that we are bringing you solutions to your problems. But al least we got your email address. Because I’ve read about a 100 articles that said that’s the thing to do.
That’s what most online businesses think. And we have to admit it.
To do everything by the book, to be able to get reports about your most profitable sources and to not spend your money away on Facebook Ads/Adwords through remarketing you need a technical person.
In the following example I described how you can do this using a combination of tools:
GetMara (for email collector)
Google TagManager (to centralize some tags, events easier)
Google Analytics (to analyze results)
Google Adwords / Facebook if we want to do remarketing for those who do not give us the email first.
Step 1. Email collector set up
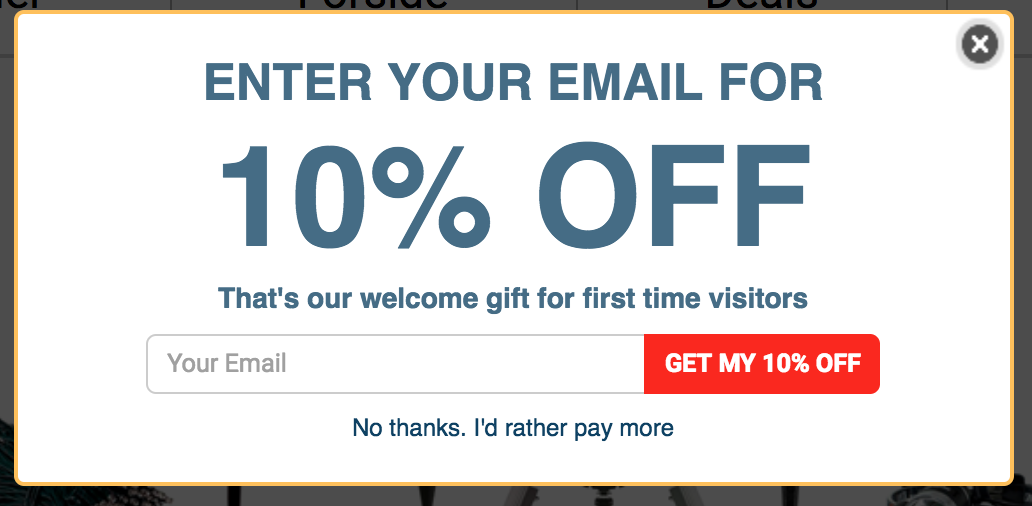
We will use our email collector campaigns for this example. There are some advantages described below, but you can choose other solutions that display a popup, a form or an input anywhere on the website.
To remember:
- To be able to add javascript after the user fills the form
- To not display the form to those who already subscribed (it’s upsetting)
- To limit the number of displays per session so that the users won’t be annoyed
From the interaction campaigns we choose one of the existing templates.
We will not insist on the campaign set up settings, but you can find details here.
On the submit event we have the option to add Javascript. We will send a Javascript event in the dataLayer that we will name: register_submit (you can use any value you want).
See step 2.
Step 2. Send a success event to TagManager
In step 1 I was talking a about the necessity of adding a javascript event after the submit event (the user subscribed). We will use this option to send the mentioned event both to Google Analytics and TagManager.
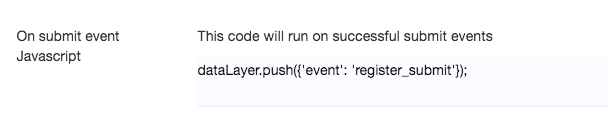
dataLayer.push({'event': 'register_submit'});
Step 3. Goal set up in Google Analytics
The Goal in Analytics should be set manually, making it easier to follow conversion tracking (subscribing with the email address). To set this Goal:
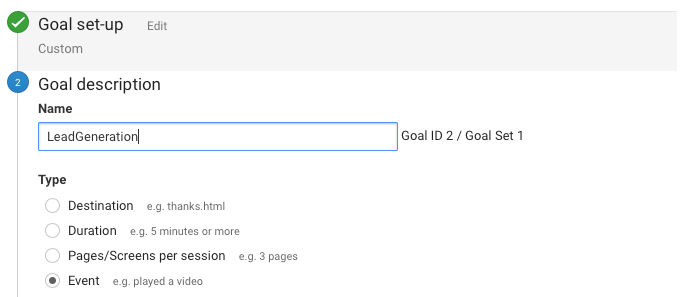
In the Analytics account, in Admin, the Goals area we choose to create a new Custom account.
In the title section we add LeadGeneration and type event.
When entering the details, we can have the following values:
Category: lead
Action: submit
Label: register
You can change these values with others, but they will have to be memorised because we will use them in a future step.
To better understand the events in Google Analytics, please read an article directly on their site.
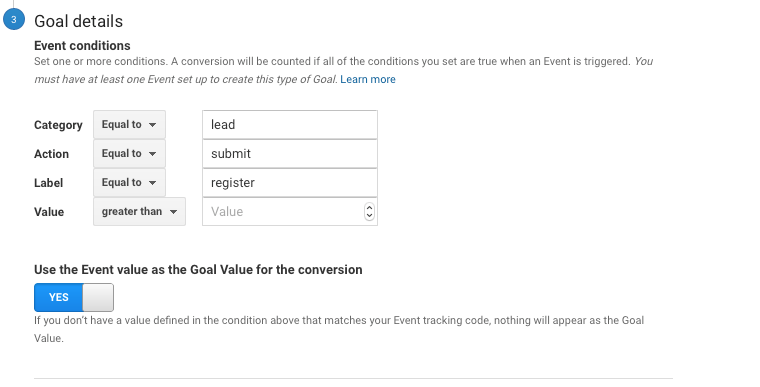
Goal value id optional and can be either Yes or No.
Step 4. Add Tags in TagManager
TagManager is an extremely interesting tool and the possibilities to integrate with other solutions are virtually limitless. We will use it to forward the event received from the email collector from step 1.
Although we could remove TagManager from ur article, we chose not to do it becouase of the main advantage: much easier tag management, all in one place.
TagManager uses 3 easy to understand concepts:
Trigger: A factor that causes a Tag to run
Variable: a name given to a fixed or dynamic value (e.g., id of the analytics code)
Tag: Action running based on the trigger.
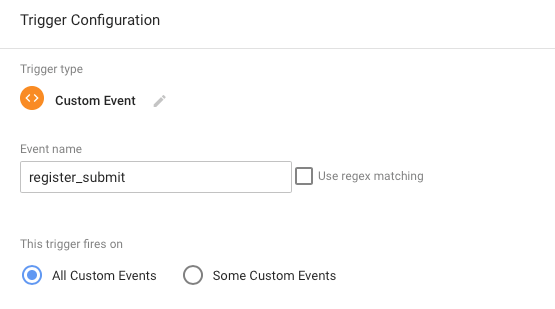
So first of all we will define a Trigger based on the event sent by Submit from step 2.
Trigger Type will be a custom event.
At Event Name we enter the value we sent, namely register_submit.
Now that we have a trigger, we can add the tag to include Facebook, Google Analytics and Adwords events:

<script>
 fbq('track', 'Lead'); // trimite catre facebook
 ga('gtm1.send', 'event', "lead", "submit", "register", 1); // trimite catre goal-ul de google analytics
 gtag('event', 'register'); // pentru google remarketing
</script>
For these events, we need Facebook Pixel and Google Remarketing Tag to already be installed on the site.
More details for installing each service:
Step 5. Set remarketing rules in Adwords and Facebook
Now that we already have the custom events sent to both Facebook and Adwords, we’ll consider the when creating the campaign.
There are 2 big option here:
Create a custom audience, similar to those who left their email address (here we need a certain number of events to be created by Facebook / Google)
Remarketing to those who visited the site but did not leave their email address (we exclude those who left it).
Excluding those who made the event in Facebook will be done by excluding the visitors who made the event called “
“. We will create a new Audience, and the campaigns you create later will use this audience.

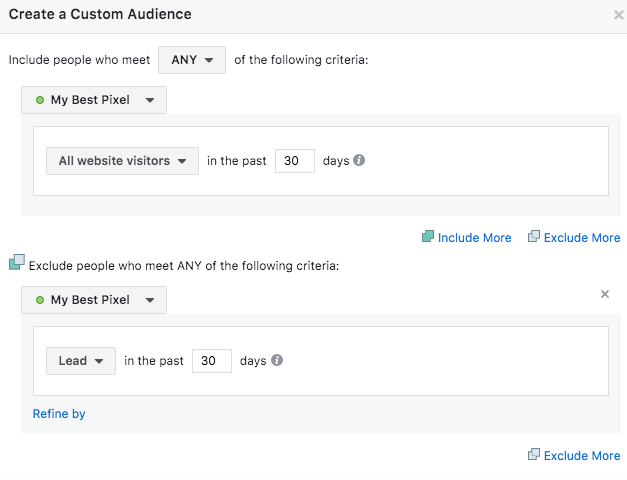
Audience: visiors who did note become leads.
Then, in audience setup, we select the pixel, enter the visitors from the last 30 days, and we exclude those who made the Lead event (it will show up in the list) from the last 30 days.
Audience: those who are leads.
We will only include those who have made the Lead event in the last 30 days.
Excluding those who did the event in your Google Adwords campaigns will exclude visitors who have made the “Register”.
Creating Google Adwords Remarketing and Facebook Ads Remarketing campaigns requires some knowledge to be properly set up. That’s why you set up a budget.
That’s all. If it’s helpful, you can help us with one share.
After completing the 5 steps, you will have a powerful lead attraction system.
- You will be able to decide yourself how much money to promote in order to make a profit.
- You’ll know the best performing traffic sources in Google Analytics.